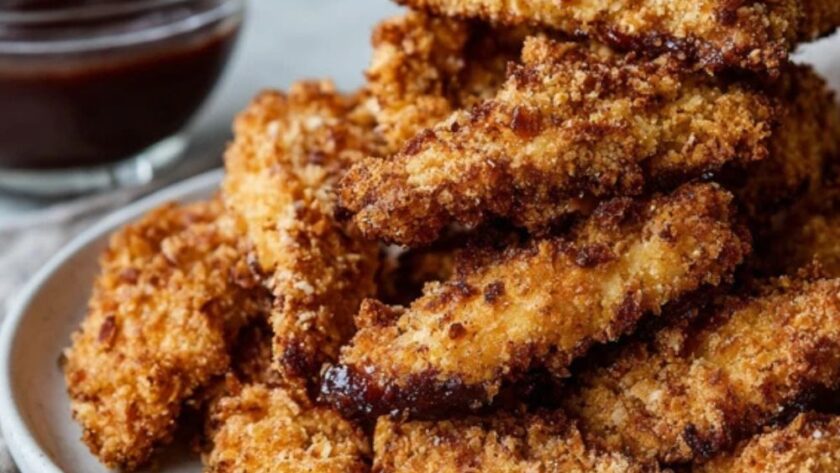
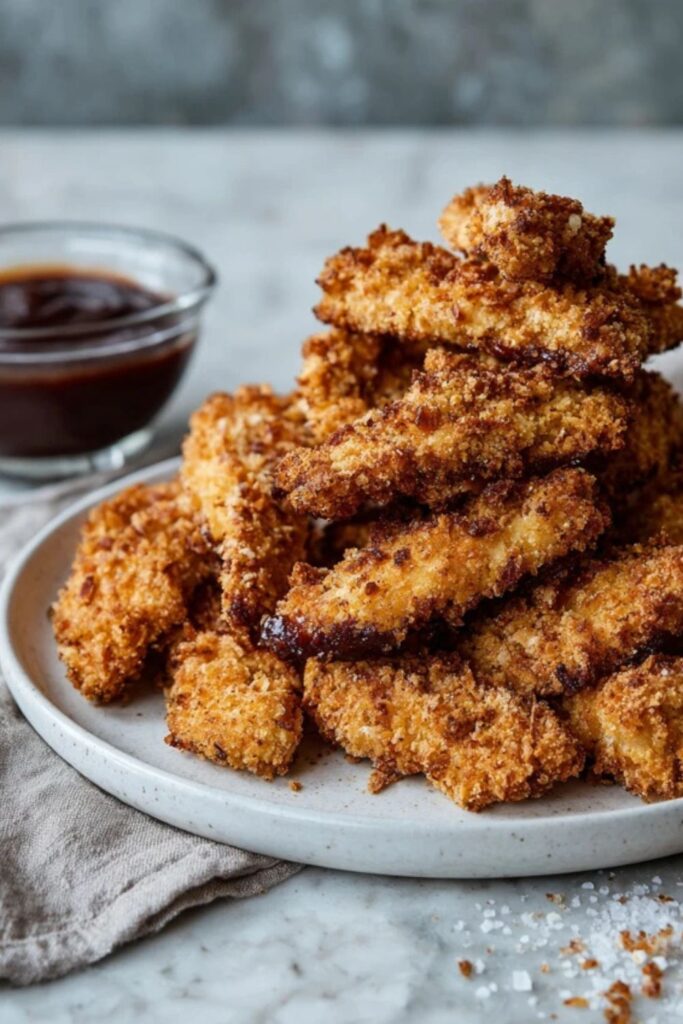
Martha Stewart Baked Chicken Fingers Recipe are a healthy American-style snack made with a crunchy coating of wheat germ, bran, and flaxseed. These nutritious strips use grated Parmesan and garlic powder for a savoury kick that kids and adults both enjoy.
If you do nothing else, use the wire rack on your baking tray instead of placing the meat directly on the metal. That’s the difference between a soggy bottom and a coating that stays crisp all the way around. The first time I made this, I forgot the oil in the breading and it tasted like cardboard. Adding that small amount of fat helps the grains toast and brown while the meat stays juicy inside.
The coating mixture is doing more work than you’d think. Without the flaxseed and bran, you lose that nutty depth that makes these better than standard frozen versions. I’ve tried a few versions of healthy goujons and this one from Martha Stewart is the one I keep going back to because it feels like a proper meal rather than a compromise. It has become my go-to for a quick Friday night dinner when I want something comforting but not heavy.
Martha Stewart Baked Chicken Fingers Recipe Ingredients
For the Coating
- 60g (2oz) wheat germ
- 30g (1oz) unprocessed bran
- 25g (1oz) plain dried breadcrumbs
- 2 tablespoons ground flaxseed
- 2 tablespoons grated Parmesan
- ½ teaspoon onion powder
- ½ teaspoon garlic powder
- 1 ½ teaspoons salt and ½ teaspoon black pepper
- 1 tablespoon olive oil
For the Chicken
- 2 large eggs
- 680g (1 ½ lb) chicken tenders or breast cut into strips
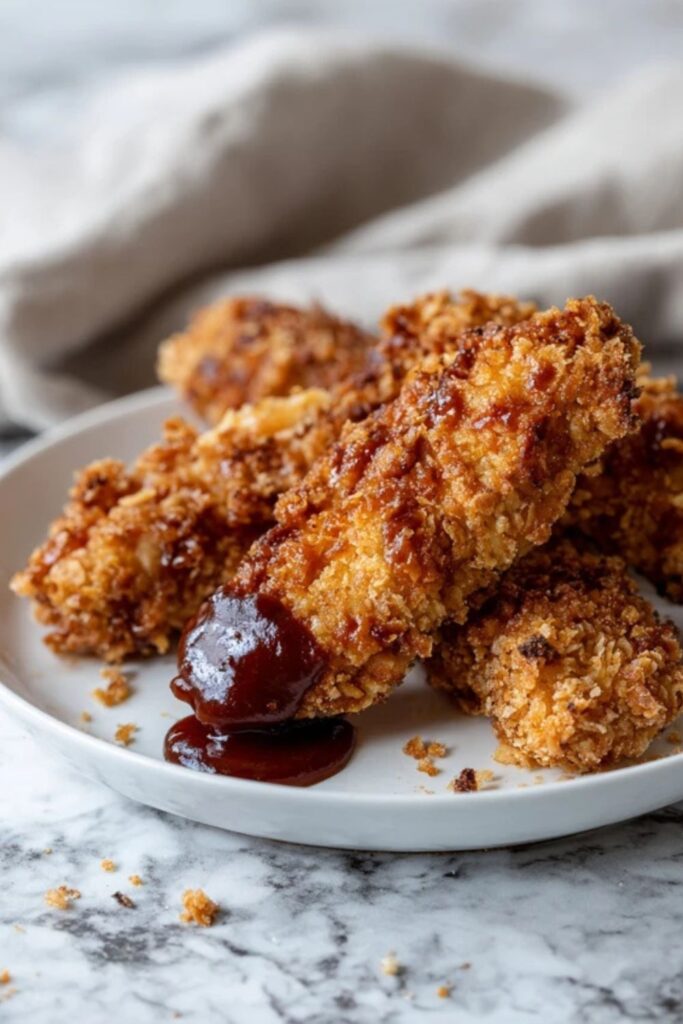
- Barbecue sauce, for serving
How To Make Martha Stewart Baked Chicken Fingers Recipe
- Prepare the oven and coating: Set the temperature to 230°C (450°F/Gas Mark 8) and pulse the wheat germ, bran, breadcrumbs, flaxseed, Parmesan, onion powder, garlic powder, salt, and pepper in a food processor. Add the oil and pulse again until the mixture looks like damp sand, then tip it into a wide bowl. This step combines the dry parts so you don’t get a clump of garlic in one bite and nothing in the next.
- Coat the chicken: Place a wire rack over a large baking tray, beat the eggs in a shallow dish, and dip each piece of meat into the egg before rolling it in the crumbs. Press the coating down firmly with your palms so it sticks to the meat rather than falling off in the oven. Move the coated pieces to the rack, leaving space between them so the hot air can move around every side.
- Bake until ready: Slide the tray into the centre of the oven and cook for 12 to 14 minutes until the meat is white all the way through. Check the thickest piece with a knife to make sure no pink remains. Serve them immediately while the coating is at its loudest crunch.

Recipe Tips
- Press the coating firmly. Use the heel of your hand to push the crumb mixture into the meat after dipping in the egg. This prevents the bran and germ from shedding when you turn or serve the chicken.
- Check the internal temperature. Use a meat thermometer to ensure the centre of the chicken reaches 75°C (165°F). This is the safest way to know they are done without cutting them all open and letting the steam out.
- Toast the crumbs slightly. If your coating looks pale, you can toast the wheat germ and bran in a dry pan for two minutes before mixing. This gives a deeper golden colour that the short oven time sometimes misses.
- Prep the chicken ahead. You can coat the strips and keep them on the rack in the fridge for up to four hours before cooking. This actually helps the breading set so it stays attached during the baking process.
- Keep the rack clean. Lightly grease the wire cooling rack with a tiny bit of oil or cooking spray before adding the chicken. It stops the protein from sticking to the metal and tearing the crust off when you try to lift them.
What To Serve With Martha Stewart Baked Chicken Fingers
Serve these alongside a crisp green salad or some steamed broccoli for a light lunch. They go well with sweet potato wedges and a big dollop of honey mustard sauce or classic barbecue dip.
If you want a fuller meal, try pairing them with a creamy coleslaw and buttered corn on the cob. The crunch of the chicken works well with the soft texture of a jacket potato or a simple herbed rice.

How To Store Martha Stewart Baked Chicken Fingers
Fridge
Place the cooled strips in a single layer in an airtight container with greaseproof paper between layers. They stay fresh for up to three days but the coating will soften over time.
Reheat
Put the chicken back on a wire rack in the oven at 180°C (350°F/Gas Mark 4) for 8 to 10 minutes. Avoid the microwave as it makes the breading rubbery and the meat dry.
Freeze
Freeze the breaded, uncooked strips on a tray before transferring them to a freezer bag for up to two months. Bake them directly from frozen, adding an extra 5 to 7 minutes to the total cooking time.
Martha Stewart Baked Chicken Fingers Recipe Nutrition Facts
Per serving (1 of 4):
- Calories: 345
- Protein: 42g
- Fat: 12g
- Carbohydrates: 18g
- Sugar: 2g
- Sodium: 980mg.
FAQs
Can I make Martha Stewart Baked Chicken Fingers Recipe in an air fryer?
Yes, cook them at 200°C (400°F) for 8 to 10 minutes, shaking the basket halfway through to ensure they brown evenly. The air fryer is excellent for this recipe because it circulates heat quickly around the textured coating.
What can I use if I don’t have wheat germ?
You can substitute the wheat germ with more breadcrumbs or crushed cornflakes if you need to. Just keep the ratios the same to ensure the chicken strips stay properly covered and crunchy.
Why is my chicken coating falling off?
The coating usually falls off because the meat was too wet or you didn’t press the crumbs in hard enough. Pat the chicken dry with kitchen roll before the egg dip and make sure to use a wire rack so the bottom doesn’t steam and get loose.
Can I use chicken thighs instead of tenders?
Yes, you can use boneless thighs cut into strips, but you’ll need to increase the cooking time to about 18 to 20 minutes. Thighs have a higher fat content and take longer to reach the safe internal temperature than breast meat.

Try More Recipes:
- Martha Stewart Baked Chicken And Onions Recipe
- Martha Stewart Chicken Salad Club Roll Recipe
- Martha Stewart Chicken Sausage And Bean Casserole Recipe
Martha Stewart Baked Chicken Fingers Recipe
Description
Martha Stewart Baked Chicken Fingers Recipe are a healthy American-style snack made with a crunchy coating of wheat germ, bran, and flaxseed. These nutritious strips use grated Parmesan and garlic powder for a savoury kick that kids and adults both enjoy.
Ingredients
For the Coating
For the Chicken
Instructions
- Prepare the oven and coating: Set the temperature to 230°C (450°F/Gas Mark 8) and pulse the wheat germ, bran, breadcrumbs, flaxseed, Parmesan, onion powder, garlic powder, salt, and pepper in a food processor. Add the oil and pulse again until the mixture looks like damp sand, then tip it into a wide bowl. This step combines the dry parts so you don’t get a clump of garlic in one bite and nothing in the next.
- Coat the chicken: Place a wire rack over a large baking tray, beat the eggs in a shallow dish, and dip each piece of meat into the egg before rolling it in the crumbs. Press the coating down firmly with your palms so it sticks to the meat rather than falling off in the oven. Move the coated pieces to the rack, leaving space between them so the hot air can move around every side.
- Bake until ready: Slide the tray into the centre of the oven and cook for 12 to 14 minutes until the meat is white all the way through. Check the thickest piece with a knife to make sure no pink remains. Serve them immediately while the coating is at its loudest crunch